How to Create an Organizer Playlist of MY HERO Content
Enrich student learning with MY HERO multimedia resources.
How to Create an Organizer of Content from MY HERO
FIRST STEP to Create an Organizer:
Be signed into your MY HERO Account.
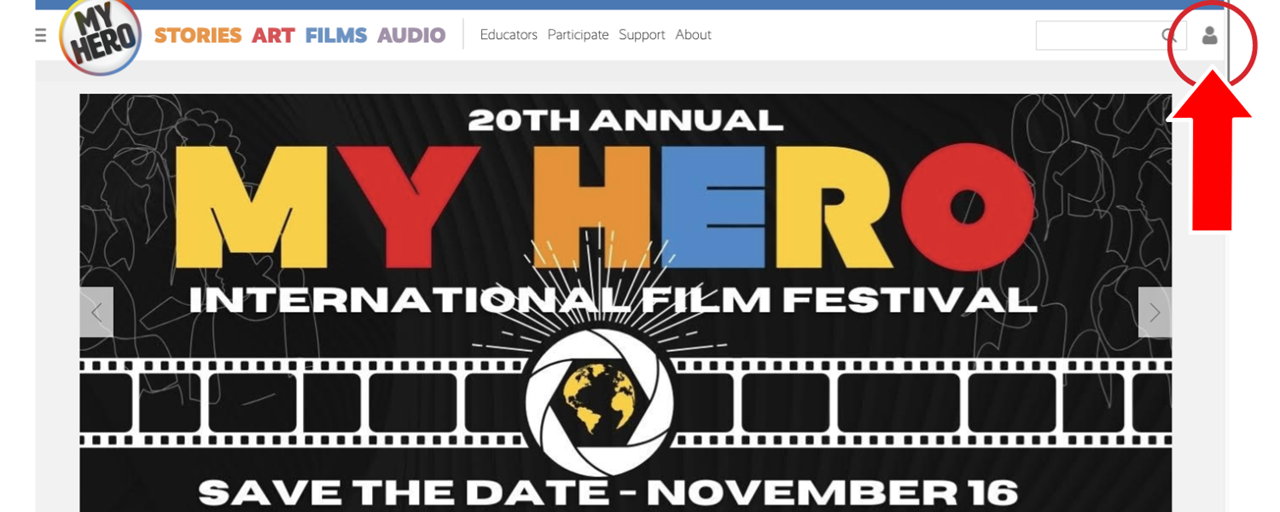
Go to the MY HERO homepage (myhero.com). Click on the top right of the page.
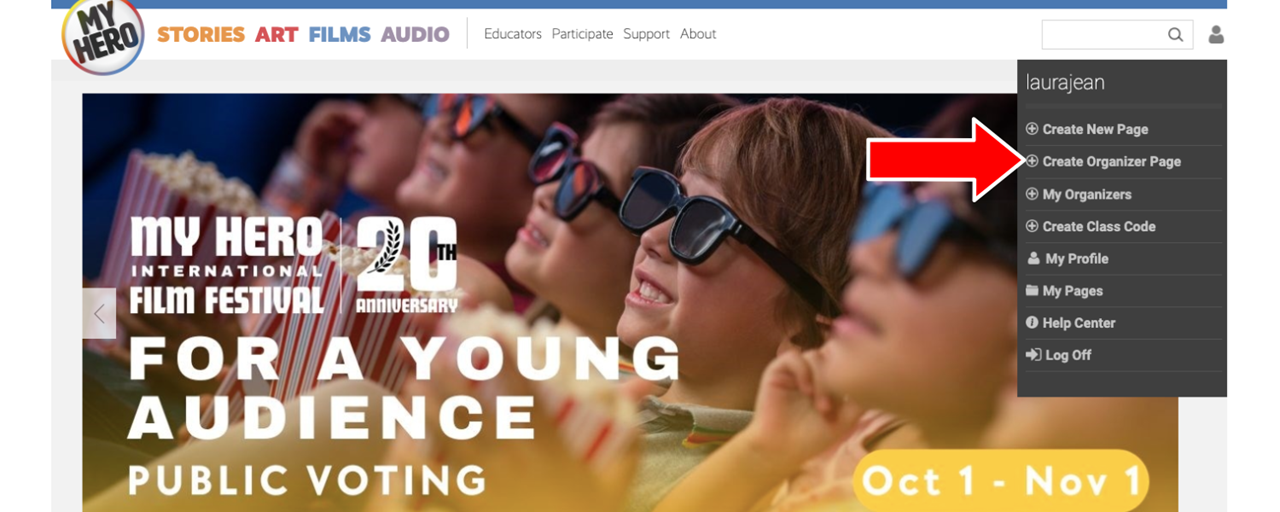
A pulldown menu will appear - scroll down to Create Organizer Page and Click.
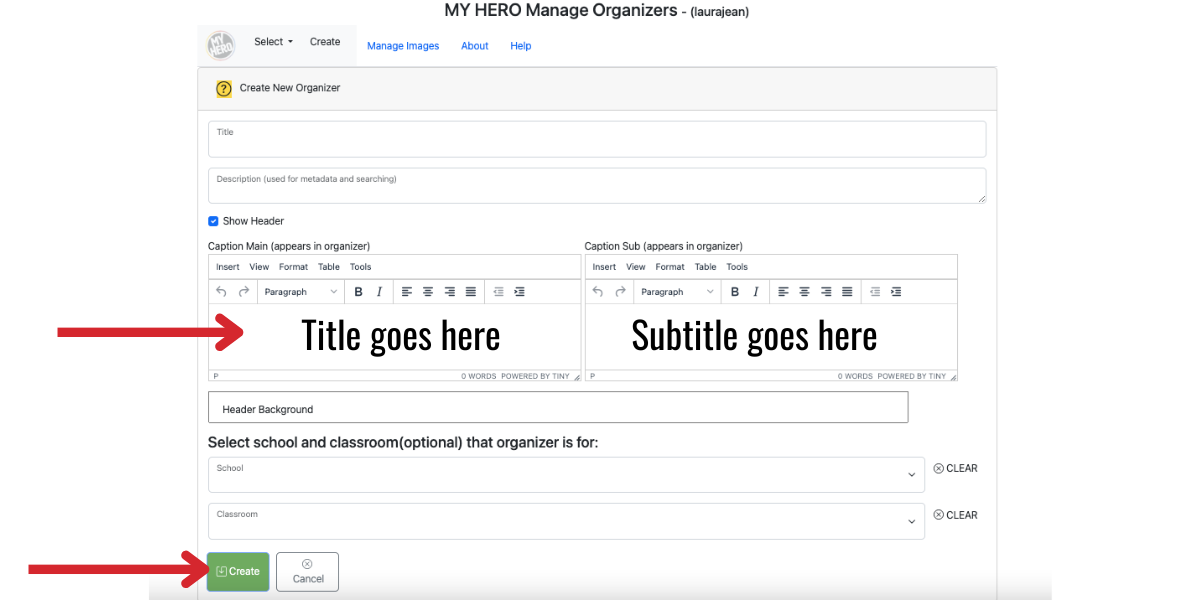
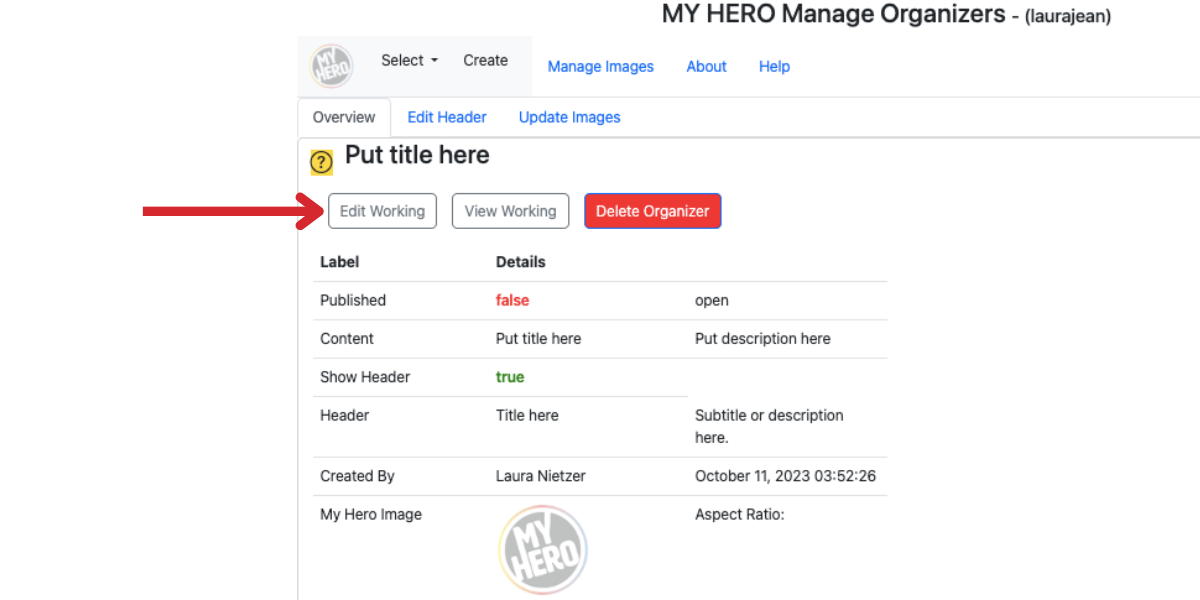
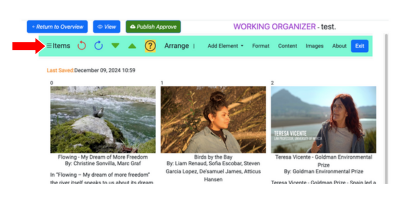
After clicking on Create Organizer Page, you will come to the page shown below.
You need to add a title and description in the top boxes. You will also need to add a main and sub caption in the larger text boxes. They can be the same.
Then click on the GREEN create button.
Next click on Edit Working to start to add content.
How to Add MY HERO Content to your Organizer
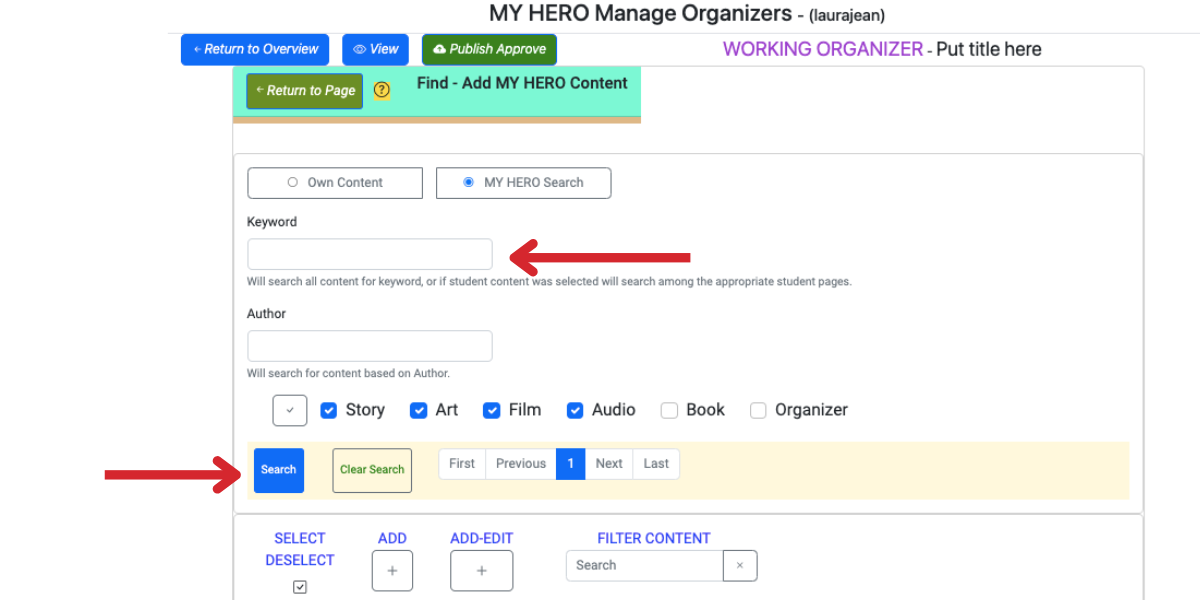
Click on Content in the top green tool bar to add MY HERO content to use with students into your organizer.

Put in a keyword or two, or title of the content you are looking for and make sure the boxes are checked for the type of media you are wanting to import (story, art, film, audio or elements from an organizer of resources). Then click the blue search button.
A list of possible choices will appear. Scroll down through the suggestions and click on the check box for the content you want to include in your organizer. The content you choose will be highlighted.
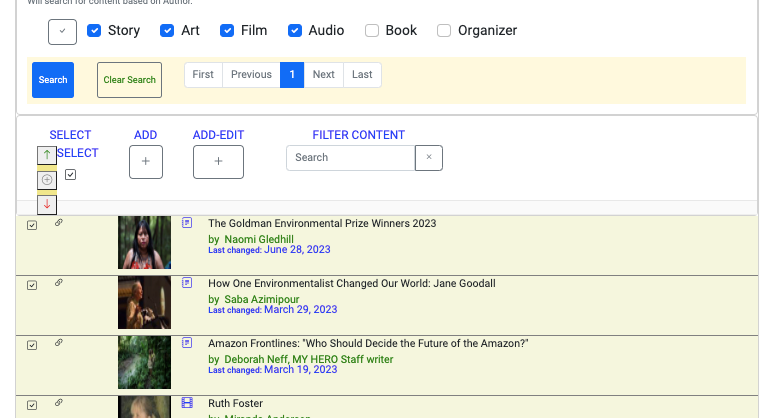
After checking the content you want to import, click on either ADD if you are going to continue adding content, or click on ADD-EDIT to go back to the organizer with the content imported.
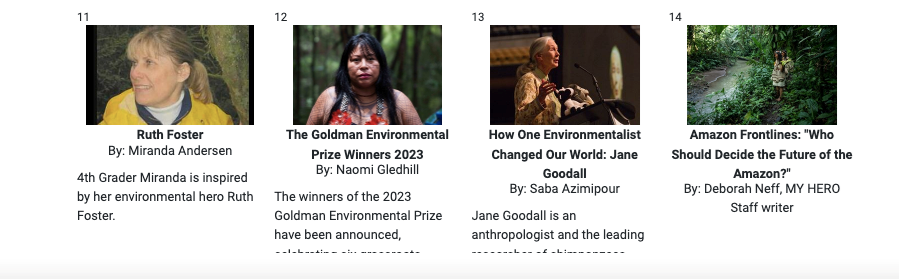
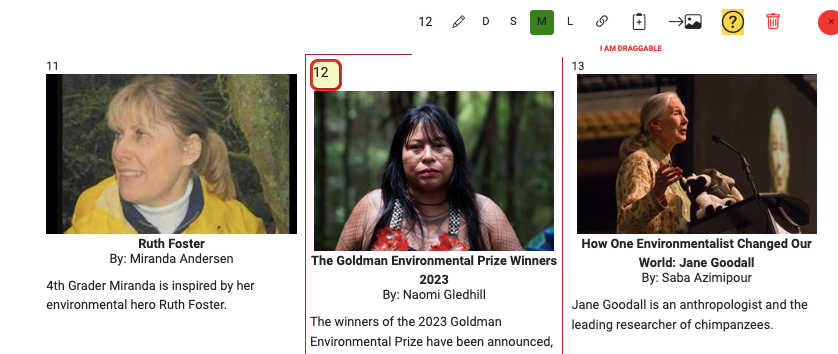
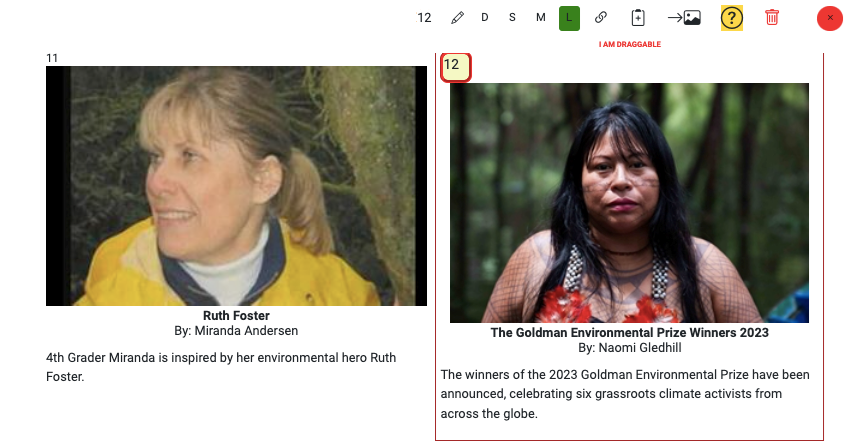
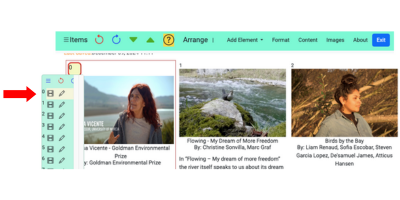
Once you have added the content to your organizer, you may want to change the size of the image associated with the content. You can do this easily by clicking on the number to the top left of the content. Then using the dragable toolbar, you can select the size you want to use. (Small, Medium, Large)

Examples of content being resized to Medium and Large.
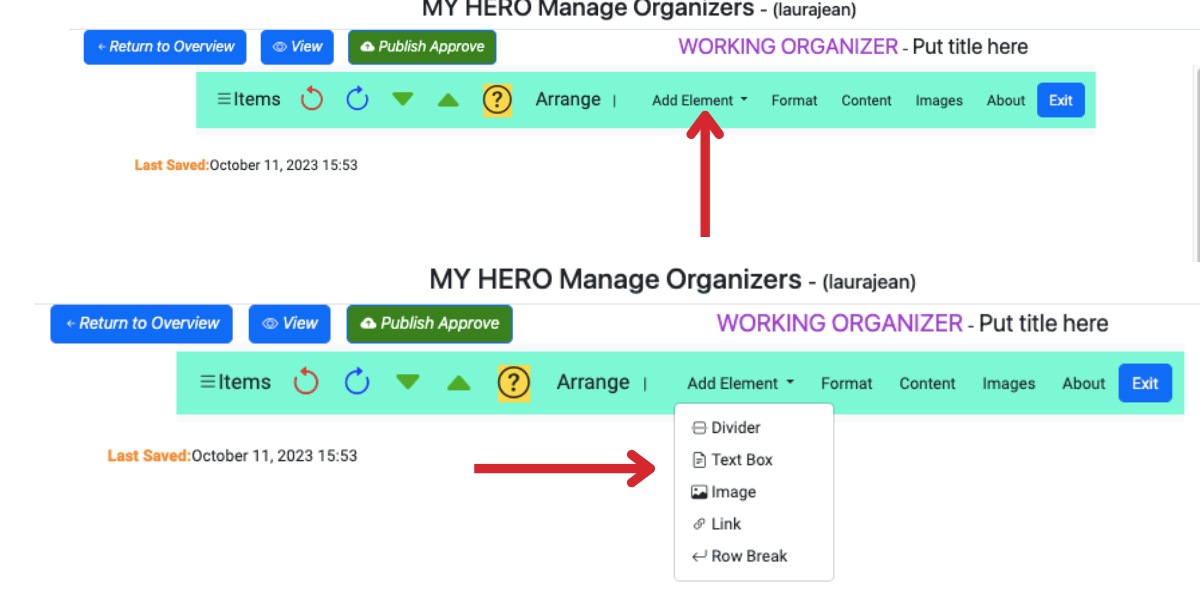
Add Elements to Your Organizer From the Top GREEN Toolbar
Once you have added content to your organizer, you may want to add an element.
After clicking on Add Element in the top green toolbar, you will see a dropdown menu where you can add a Divider, Text Box, Image, Link, or Row Break.
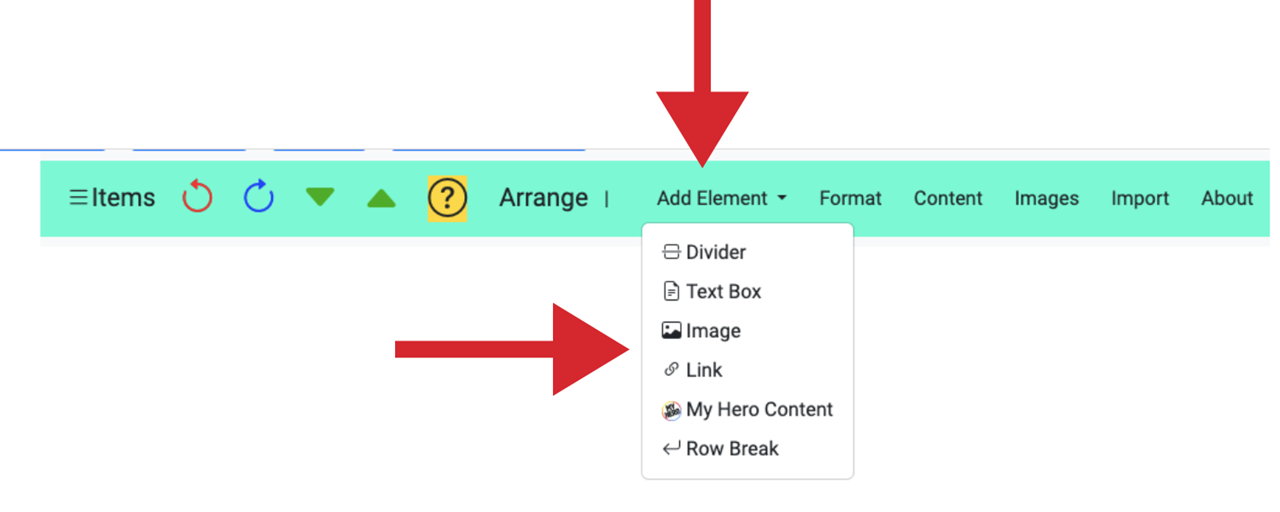
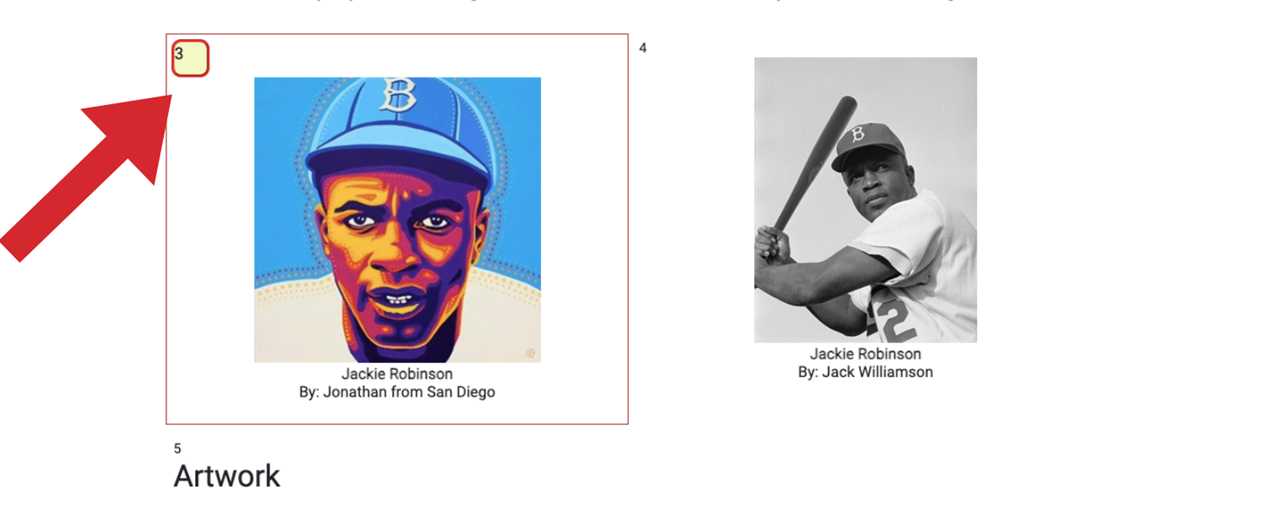
If you want to insert content, a text box, an image or divider at a certain part of your organizer, just click on the number box to the left of the content above where you want to insert an element. The box will then have a red outline and change color. Then insert the element and it will appear after the content you clicked on.
Add a Divider
This is an example of a divider... a way to introduce what content is below. (Note the text is large and bold)
Add a Text Box
To add a text box, click on the Green top toolbar Add Element and choose Text Box from the drop down.
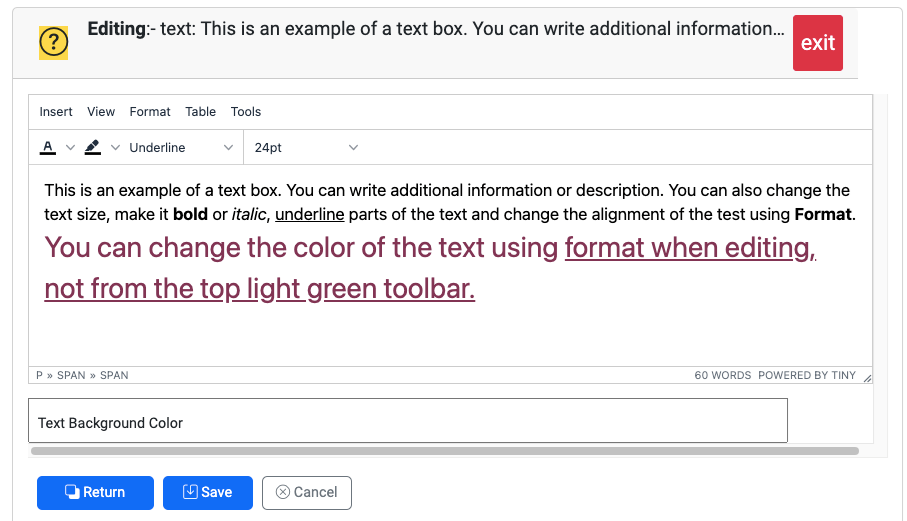
Click the blue Save button to insert your text box into your organizer. Below is what the text box will look like in your organizer. (Note that when you are creating or editing the text box, you can change the font color, make it bold or italic or underline.)
This is an example of a text box in your organizer. You can write additional information or description. You can also change the text size, make it bold or italic, underline parts of the text and change the alignment of the test using Format. You can change the color of the text using format when editing, not from the top light green toolbar.
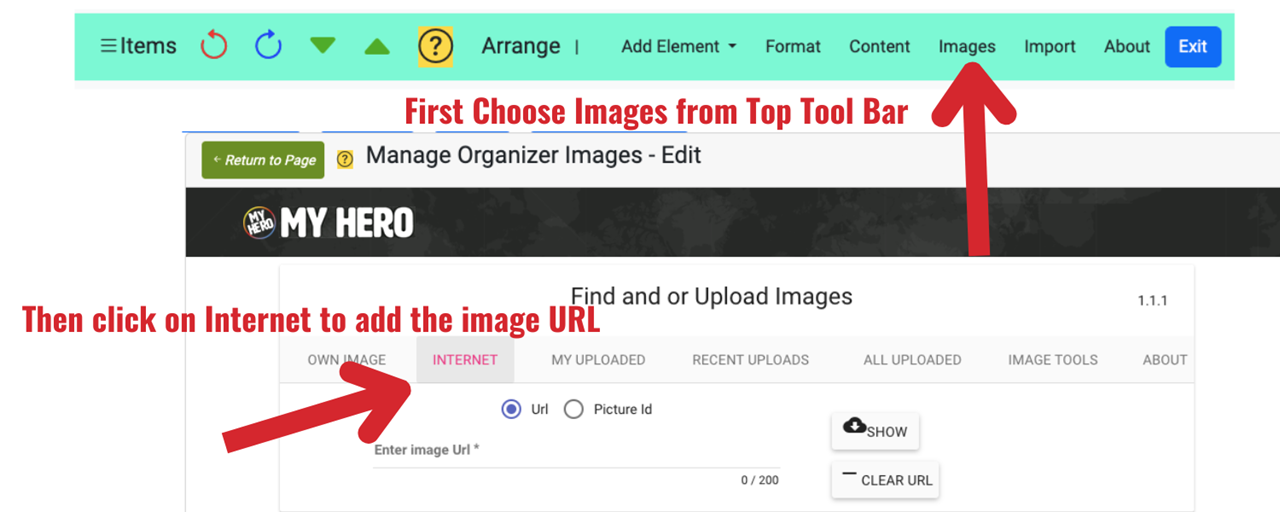
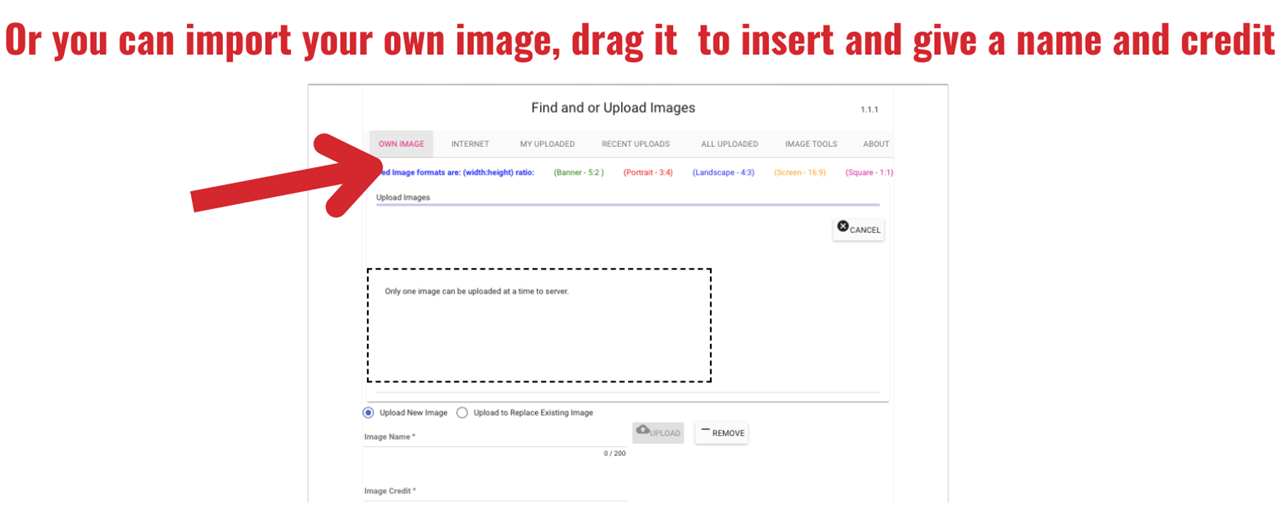
Add an Image
There are two different ways to add an image to your organizer using the top green toolbar - either chose Add Element pull down menu or Images.
It is suggested to use the Images button on the green toolbar as it is easy to add your own image. This way you can either use the URL Image address or drag your own image in to your organizer.
Move Content in an Organizer
First, go to the top left of the page and click on Items.
Next, click on the number of the content (image, media, tet box, divider, etc...) you want to move.

Finally, move the content number on the list from the left to where you want it to be placed.
Additional Helpful Information
What do the buttons below mean?
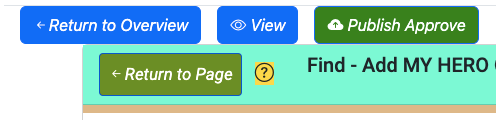
Return to Overview: Will go to the page you started once you created your organizer. It is also the page that you will go to if you choose My Organizers from the MY HERO website pulldown menu.
View: To see what your published organizer will look like.
Publish Approve: Will submit your organizer to MY HERO for publication. Don't use this until your organizer is complete.
Return to Page: You will go back to editing your organizer.
Organizer created on 10/11/2023 3:52:26 PM by Laura Nietzer
Last edited 8/25/2025 8:39:24 AM by Naomi Gledhill